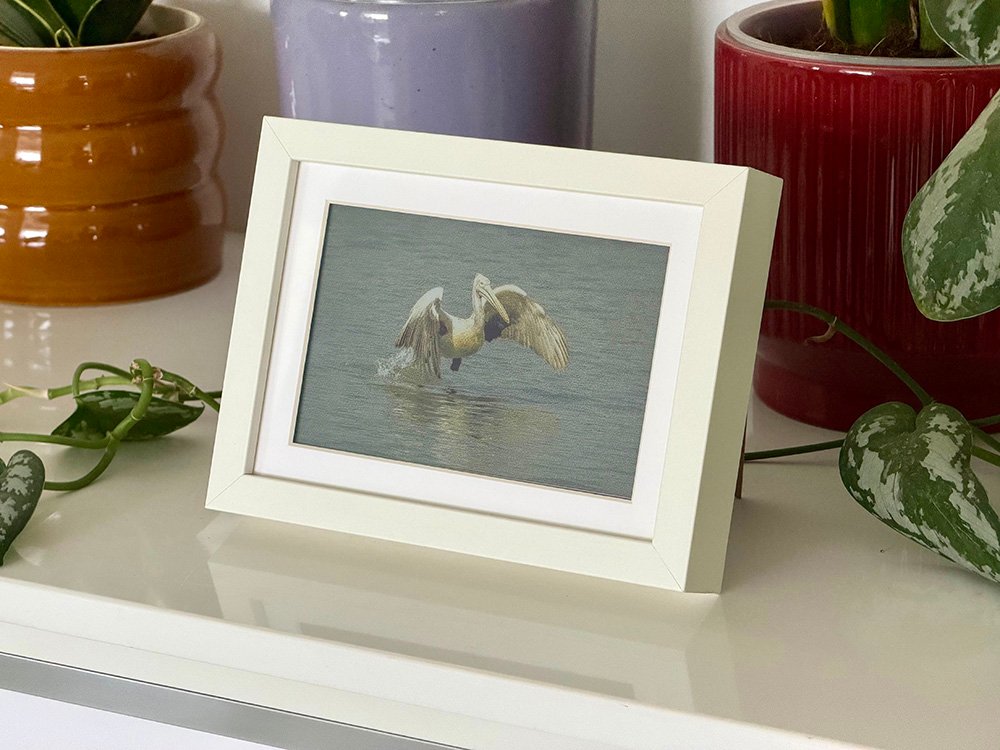
I came across this blog post by Guy Sie detailing a Spectra 6 based e-ink display to use as a picture frame. The premise is quite simple and enticing: a dynamic picture frame that doesn’t look like a display and can show images relatively well as long as the images are encoded properly for it. I ended up getting one and set it up to work with Home Assistant.
Disclaimer: The Arduino firmware for this project and parts of Ink Frame Lab has been developed with help from AI tools. The design decisions, architecture, and hardware debugging were done manually, with AI assisting primarily in code generation and iteration.
Its nice, but..
After living with the Home Assistant setup for a while, a few friction points became clear:
- It wasn’t standalone. The frame needed a Home Assistant instance running somewhere on the network to serve images. That’s fine for my setup, but I wanted this to be something I could give as a gift to someone who doesn’t have a Home Assistant setup or a NAS. A picture frame shouldn’t need infrastructure.
- No battery visibility. I had to open Home Assistant to check the battery level. For something that sits on a shelf and sleeps most of the time, I wanted a glanceable indicator on the display itself.
- The image processing workflow was rough. There are tools online that can dither images to the Spectra 6 color palette, but you still have to manually crop and resize each image before dithering. That’s not something I can ask a non-technical person to do if they want to add new photos. Also, most web based tools lack batch image processing and can only process one image at a time - fine for the odd experiment, but impractical when you want to process a bunch of images in one go.
- No way to preview the end result. E-ink panels have quite muted colors - for example white is more of a light bluish grey on the display, and there’s no backlight, so images look very different depending on ambient lighting. I wanted to be able to visualize how a processed image would actually look on the panel in the real world in different lighting conditions before committing to it.
Ideas and dead ends
My first idea was to expose the SD card as a USB drive when the device is plugged in, so you could just drag and drop images like a thumb drive. This turned out to be a hardware dead end: on the reTerminal E1002, the USB-C port is routed through a CH341 UART bridge chip, which can only do serial communication. The ESP32-S3 does have native USB OTG that could theoretically do mass storage, but those GPIO pins (19/20) are repurposed for the I2C bus on this board. There’s no way to present a storage device to the host without physically modifying the PCB.
The fallback was Wi-Fi. The ESP32-S3 has Wi-Fi built in, so the device could host a small web server with a drag-and-drop upload page. No app needed, works from any phone or laptop browser. The question was how to make this accessible to someone who has never configured a microcontroller. The answer turned out to be using the device’s own Wi-Fi access point - the frame creates its own network, the e-ink screen shows the network name, password, and URL in large text, and you just follow the steps. No router configuration, no IP address hunting.
The solution
I ended up building two things: custom Arduino firmware for the reTerminal E1002, and Ink Frame Lab — a browser-based tool for preparing images for e-ink displays.
Firmware for reTerminal E1002
The firmware replaces the stock ESPHome setup with standalone Arduino code that doesn’t need Wi-Fi or Home Assistant during normal operation. The device reads PNG images from the SD card, picks one (randomly or sequentially based on a config file), renders it to the e-ink display with a single-pixel horizontal battery indicator bar at the bottom, and goes into deep sleep until it’s time to change.
The web server mode is a secondary boot mode activated by holding the green button during power-on. The e-ink screen shows step-by-step instructions with the Wi-Fi credentials and URL, and the web interface lets you upload, delete, and manage photos, configure the rotation interval, and choose between random or sequential display order. In sequential mode, the two white buttons on the device navigate forward and backward through the images. When you’re done, the device enters deep sleep for a couple of seconds and wakes up as a clean cold boot into slideshow mode.
As a side effect of running standalone and not needing to maintain a Wi-Fi connection, battery life improved significantly. My device is set to change images randomly every 4 hours and loses about 10% over a week.
Here are the firmware files for reTerminal E1002 and installation instructions.
Ink Frame Lab
The image preparation side of the problem needed its own tool. Existing dithering tools handle the palette conversion, but none of them solve the full workflow: crop to the panel’s aspect ratio, resize to 800×480, dither to the Spectra 6 palette, and preview how it will actually look on the muted, non-backlit display.
Ink Frame Lab is a browser-based tool that handles all of this. You import images, crop them with a locked aspect ratio, preview the dithered result, and - the part I’m most pleased with - inspect it in a 3D view that simulates different lighting conditions and angles. This matters more than you’d think: an image that looks great on your monitor can look muddy or washed out on the actual panel, and being able to preview that before exporting saves a lot of trial and error. Oh, and you can bulk edit and export images - no need to process images one at a time.
You can read more about this tool here and a functional web version is here.
Credits
- Three.js - 3D rendering, used for the frame viewer, IBL lighting, and post-processing pipeline (OrbitControls, RoomEnvironment, RGBELoader, EffectComposer, GTAOPass, OutputPass).
- OpenDithering - the image adjustments pipeline (DRC, tone mapping, S-curve, saturation, exposure) was ported from this project by Guy Sie.
- epdoptimize - inspiration and references for image processing and measured values
- JSZip - client-side ZIP archive creation for the Export ZIP feature.
- Inter - UI typeface by Rasmus Andersson, served via Google Fonts.
- Dithering algorithms - error diffusion kernels (Floyd-Steinberg, Atkinson, False Floyd-Steinberg, Jarvis-Judice-Ninke, Stucki, Burkes, Sierra-3, Sierra-2, Sierra-2-4A), ordered Bayer matrix, and random noise dithering are original implementations of published public-domain techniques.
- Polyhaven - images used for image based lighting in the 3D view.
Future plans
- Improve the 3D viewer of Ink Frame Lab - the lighting simulation works but could be more realistic.
- Add more presets for different devices and panel types - the only verified device preset here is the reTerminal e1002, and I’ve added specs for some other devices by getting their specs off the internet.